Create Windows VM using Terraform
Date published:
This tutorial will show how to create a Windows Virtual Machine (VM) using Terraform. This post will offer the best practice on deploying the resources using Infrastructure as Code. An Infrastructure as a code tool like Terraform makes deploying and destroying environments easier when integrated with Azure DevOps.
What is Infrastructure as code?
This method describes an Infrastructure as code such as Terraform, Bicep or ARM template is used to store in a source control repository. The following Windows virtual machine will be deployed to Azure using terraform using Azure DevOps and storing the VM password in a key vault.
Prerequisite required
- Azure DevOps for creating pipeline build
- Storage Account for storing the terraform State Files
1) Storing Terraform State File
This configuration deploys the virtual machine and holds the state file. I have used the following Azure Powershell command to create a resource group, storage account and a blob container.
|
|
This image is when you run the command.

1.1) The Container and the backend configuration ensure that the State Files are stored and accessed centrally. However, it does not matter where you deploy the resources, whether locally or through Azure DevOps. The configuration used for the backend will look like this:
|
|
2) Creating Service Principle
The next step is to create a service principal to authenticate Azure DevOps. Go to the Azure DevOps Portal https://dev.azure.com and then navigate to your project and click on project settings in the far left corner. After going to the service connection under pipeline: Click on the new service connection. Then select Azure Resource Manager. Service principle (automatic).


Complete the new service connection by selecting the subscription, resource group and a name.

3) Configuration
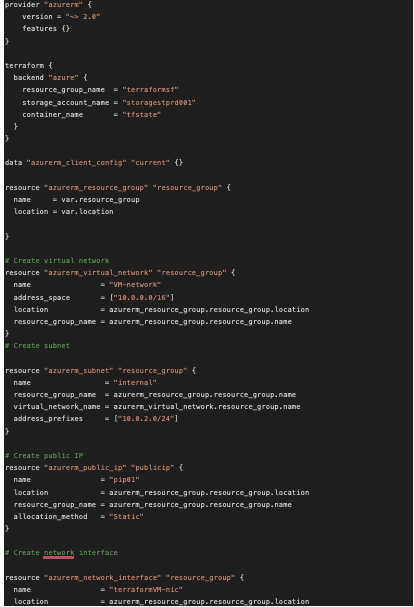
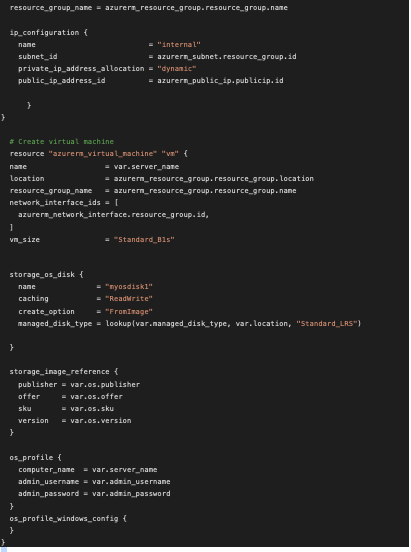
The configuration will be provisioning the virtual machine, as shown below.
—Main.tf - main configuration terraform file that define the resource.
– Variable.tf - A variable let you define the infrastructure value
– Output.tf - display information you want as a command line
– terraform.tfvars - used to set the values to call the variable
Below is an example of the code used to create the virtual machine. The full code copy is found in my repo here Windows Virtual Machine. I would advise that you folk the repo to your GitHub repository and import it to Azure DevOps.
4) The Pipelines
In this stage, we will start creating the pipeline. I have used the following terraform file to deploy the virtual machine to Azure.
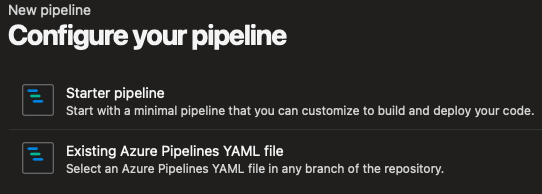
Go to your repo in the Azure DevOps portal and click on set up build to start creating your pipeline. In the Configure your Pipeline page, select Existing Azure Pipeline YAML File. Afterwards, choose the azure-pipeline.yml file in the WindowsVM directory. Review the YAML code, and when you are ready, click on the run to start creating the pipeline.

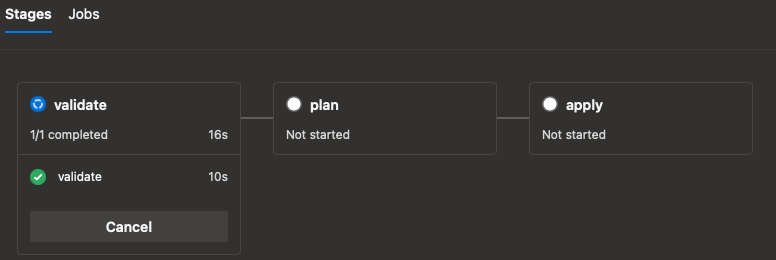
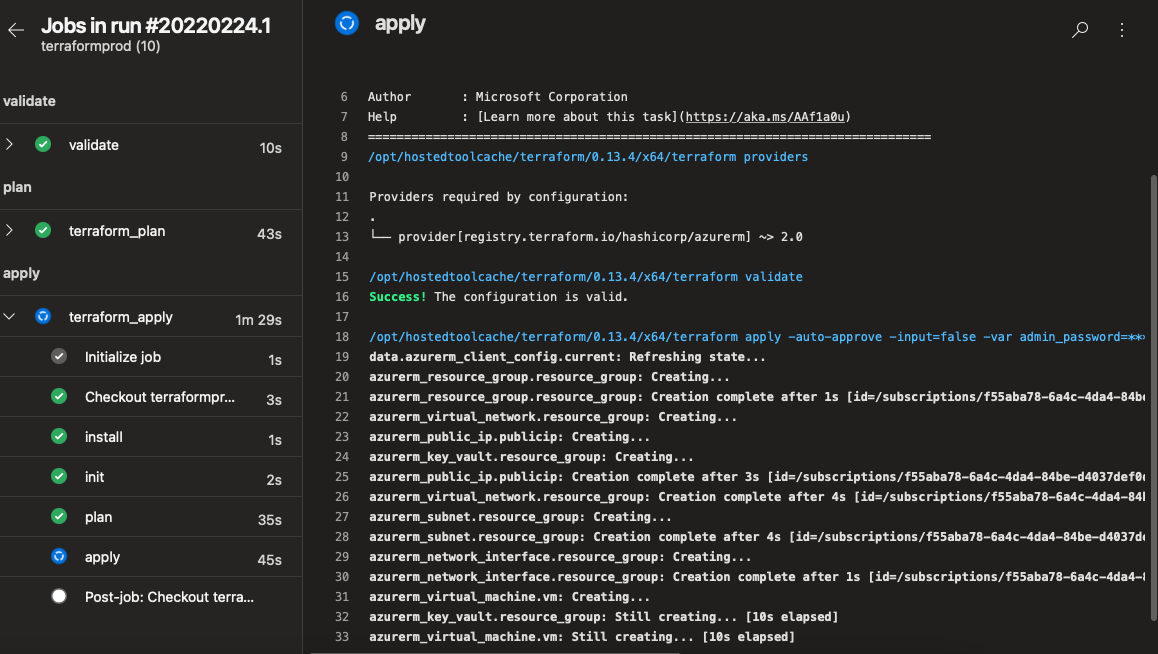
Once the pipeline has started running, you should see each job’s progress. You can view the overview status when you go inside one of the stages. Below is the apply stage, where it starts creating the resources required to deploy to Azure.
5) Resources Deploy to Azure
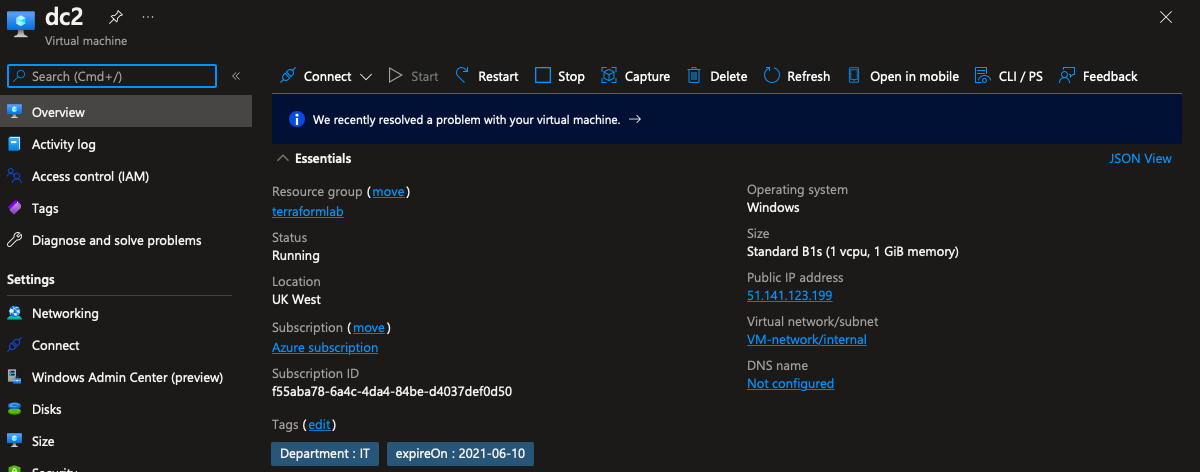
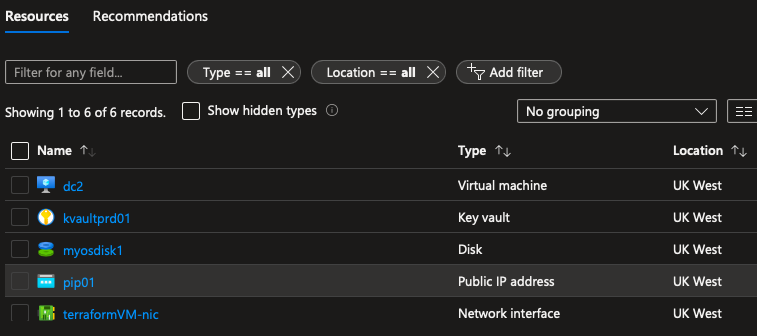
The job of the pipeline succeeded, and the virtual machine was created and deployed to Azure. You can see all the resources deployed when you go to the Azure portal. A list of resources deployed includes Virtual Machine, Key Vault, Virtual Disk, Public IP, Network Interface and a Virtual Network.
6) Destruction Resources with Azure DevOps Pipeline
When you are ready to destroy the Virtual Machine, trigger the " DestroyVirtualMachine " pipeline. It will remove all the resources within Azure, and you can see it has destroyed nine resources.
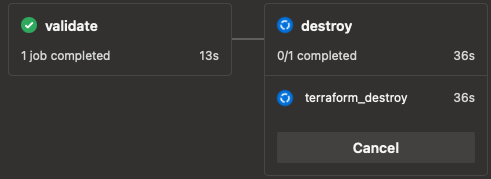
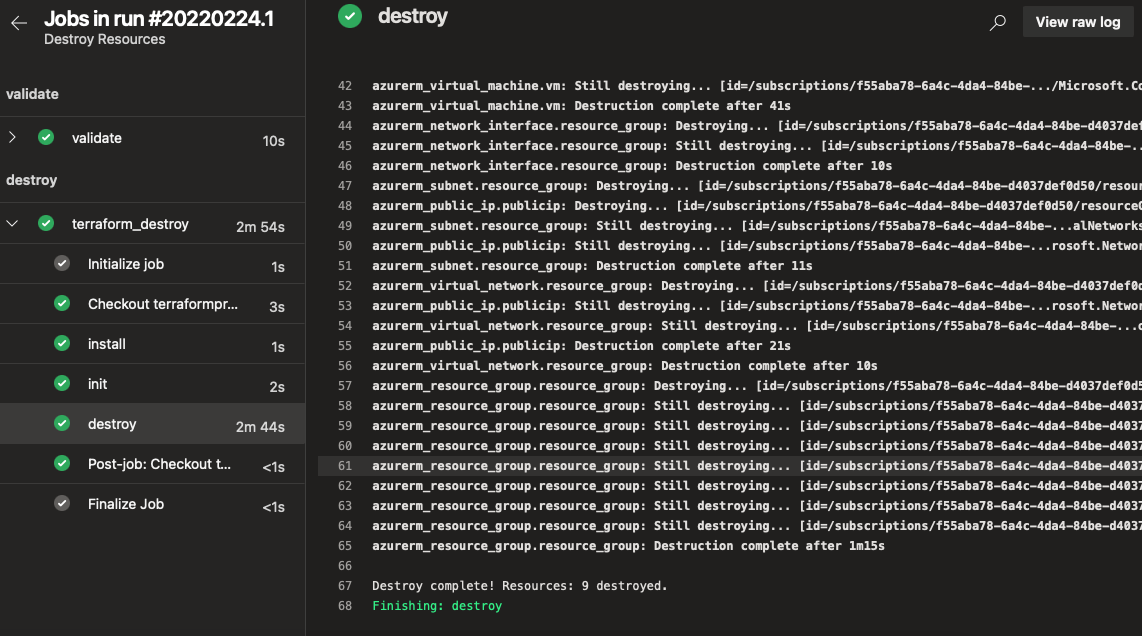
Once the destroy command runs, the stored state file’s container will change to available.

Thank you for reading, I hope you enjoy it :)
Further Reading

