

Using Terraform with Azure DevOps
Date published:
Terraform is an Infrastructure as code tool that provision and manage cloud and on-premise resources. It is an open-source declarative language that is easy to understand that allows users to dispose of any environment quickly. I will use terraform in this tutorial to create and manage Azure resources.
There are four key points in using terraform: provider, resources, state, and data sources. The provider is the cloud provider, such as AzureRM for Azure, and the resources describe the Infrastructure resources, such as virtual networks. The state file maps the resources to the configuration file, whereas the data source is read-only configuration data.
It is good practice to store the code within a remote repository like Git when coding. There are five main commands in terraform, and these are:
- Terraform Init
- Terraform Plan
- Terraform Apply
- Terraform Output
- Terraform Destroy
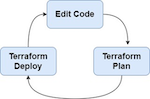
The image explains a terraform Infrastructure as a code environment.
What is Terraform State file?
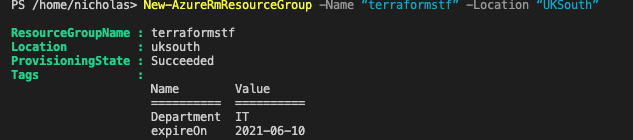
Terraform stores all the Infrastructure in a state file that generally keeps track of any resources state. I will be using the Azure CLI to create the resource group, storage account and a blob container.


Creating Azure DevOps Project
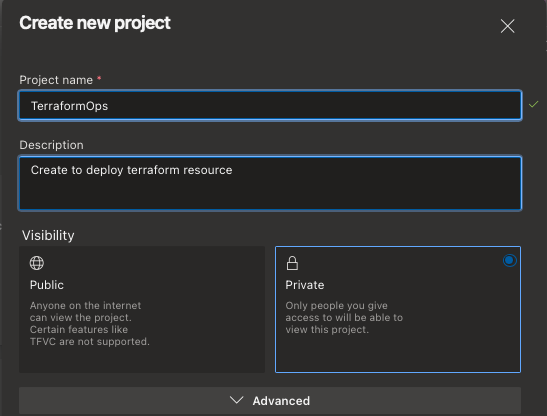
Create an Azure DevOps project by going to https://dev.azure.com then clicking on the New Project tab and giving the project a name.
Authenticate to Azure
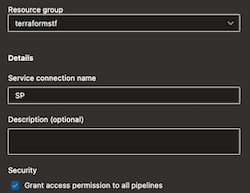
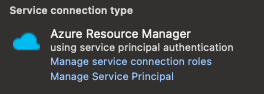
When deploying any resources from Azure DevOps, it will need to authenticate to the Azure by creating a service principal (SPN) by going into project settings on the bottom right and clicking on service connections on the pipeline section.


Click on Azure resource manager and Service Principle (Automatic) in the service connection. (Please make sure you select the option access permission to other pipelines.) Once the subscription is detected, select the resource group created earlier in the lab and give the service principal a name.
After creating the service principal, you will need to change the name by clicking on the manage service principle, which will direct the Azure portal and click the branding & properties section.

I would recommend giving the service principle contributor access to the subscription. To do this, follow the Microsoft guide here Assign Azure roles using the Azure portal
Understanding Azure Pipelines
Azure DevOps used YAML to create a build pipeline that must have at least one job, which can have multiple steps. A step can consist of different stages that can contain various jobs too. It is good practice that every pipeline follows the pull-request process to ensure all the changes are verified and approved before being merged into the main production branch.
Here are some types of functions made from azure DevOps .yaml with resources from Microsoft Doc with examples:
– Single and Multiple Jobs - This is often one job Specify jobs in your pipeline
– Pull Request - Created a pull request and merged it into a branch Build Azure Repos Git or TFS Git repositories
– Scheduled Triggers:- run a pipeline at a specific time [Configure schedules for pipelines] (https://docs.microsoft.com/en-us/azure/devops/pipelines/process/scheduled-triggers?view=azure-devops&tabs=yaml)
– Pipeline Trigger- can be used to trigger one pipeline after another Trigger one pipeline after another
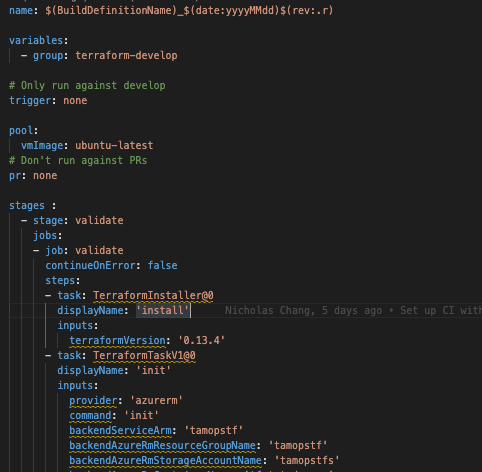
Variable Groups
A variable group stores secrets and other values passed into a YAML pipeline. Add & use variable groups. A variable group called terraform-develop will create providing an environment name and a value for it.
Azure Pipelines
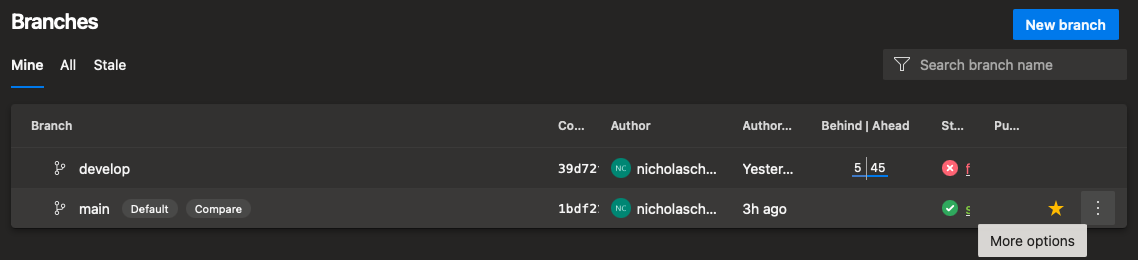
I will be looking at the pipeline in this stage and the two branches.
develop:- This will deploy the built environment master:- This will deploy the production and DR environments
In the pipeline, it will have two stages.
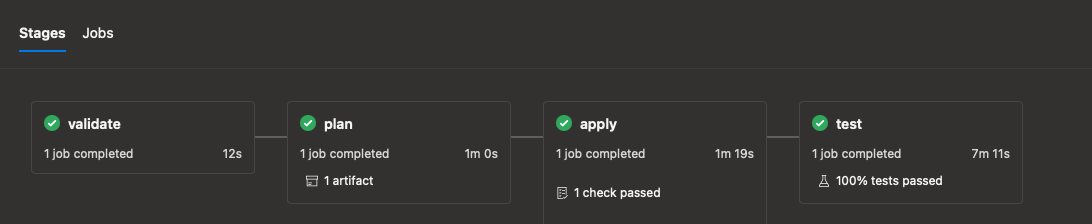
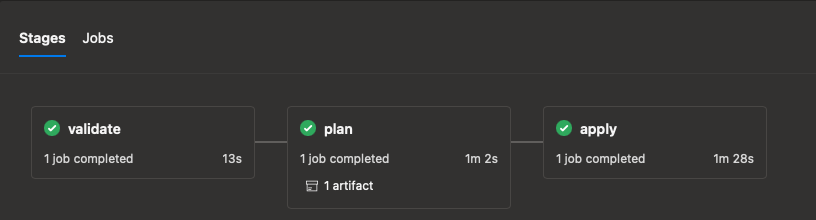
Validate: is used to confirm the Terraform code; if validation fails, the pipeline fails.
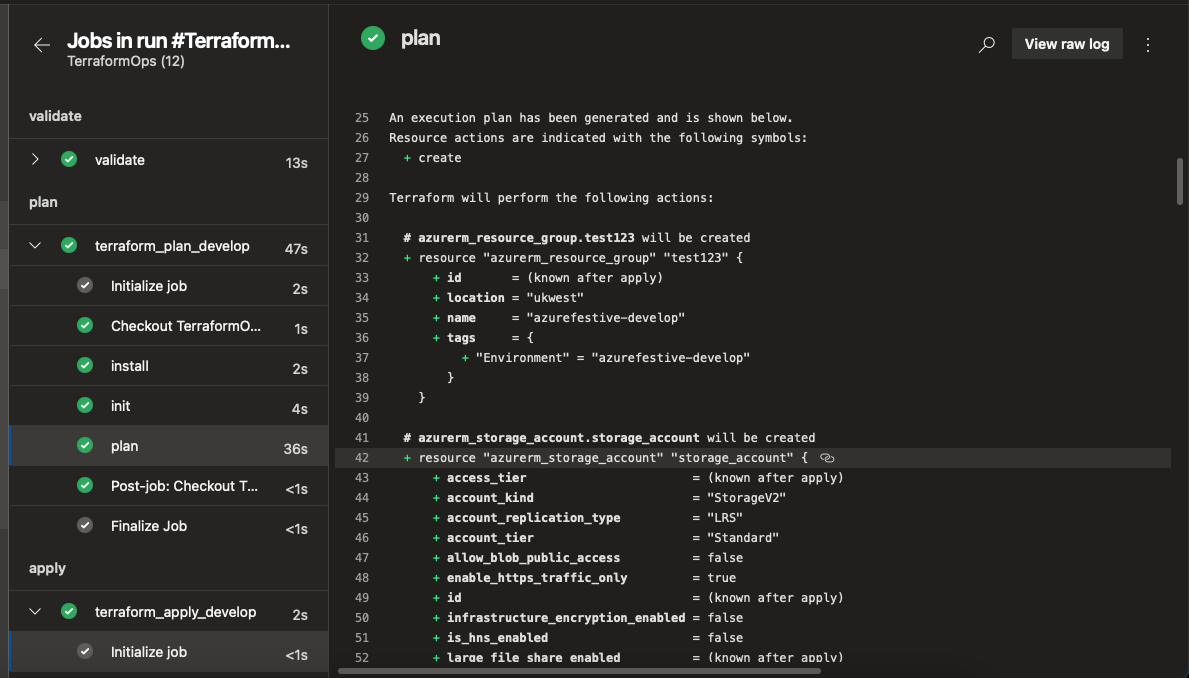
Plan:- shows the Terraform Plan.
Deploy:- if validation is successful, it moves to the next stage of the pipeline, which is Deploying the Terraform code to deploy required Azure Resources (consists of Terraform plan & deploy)
Here is a copy of the Azure-Pipeline
Once the pipeline has run, it should take several minutes to complete. You can view the overview of the plan’s progress before it gets deployed into Azure.
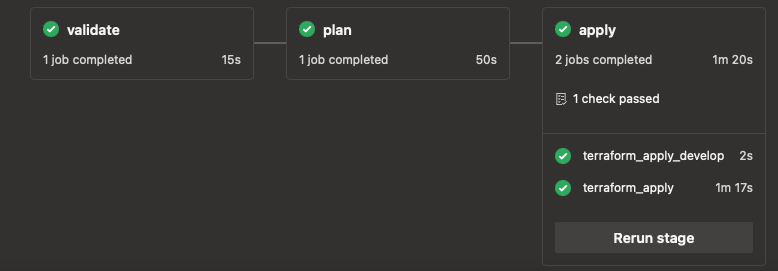
When the build is complete, it should deploy the resources in Azure.
Branching Strategy
The branching strategy in this section is launchdarkly.
launch darkly with feature branching - This method allows developers to work on a branch in a central repository and add feature flags before pushing it to the production branch. Feature Branching Using Feature Flags
Triggers
A trigger to run a pipeline automatically. There are different types of triggers, but I will primarily be looking at the branch and pipeline triggers.
-
Branch Trigger - This updates branch automatically when a pull request has been approved into the develop branch
-
Pipeline Trigger - Used when a pipeline fires to trigger another pipeline.
CI/CD Pipelines
This process will use the Develop Environment to validate our code and use the Azure DevOps policy for raising pull requests for validation.
The below validation code will have two steps of validation and plan.
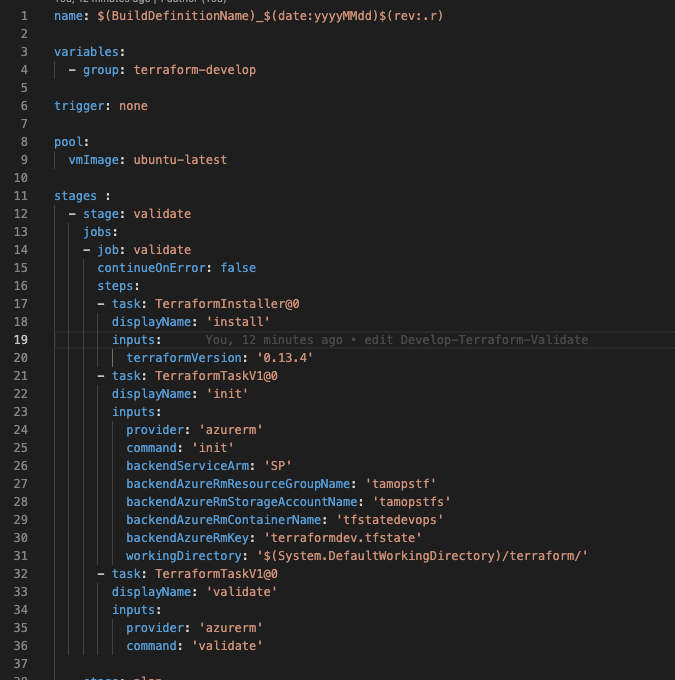
The complete code can be viewed here Validation-Pipeline
After the pipeline, the next step is to add a pull request in Azure DevOps > Repos and Branch. Right-click on the develop branch and Click on branch Policies in the branch. It is good to consider testing the code locally before raising a pull request.
- Build pipeline:- Assign the pipeline created earlier
- Trigger:- Automatic
- Policy requirement:- Required
- Build expiration:- Immediately when Develop is updated
- Display Name:- Accurate display name of the build validation
Test Branch Policy
In this stage, the test branch policy will trigger the pull request. The policy validates code, and the pull requests cannot continue until the reviewer has confirmed the request.
Before creating the pull request, the following code will produce the branch locally and commit it to Azure DevOps Repo.
- Git checkout -b Cleanup-Dev
- Git add
- Git commit
- Git push origin Cleanup-Dev
Go back to the Azure portal and create a pull request to the Develop Branch. The pipeline will run automatically.


After the pipeline runs successfully, the next step is to apply validation to the develop and the main branch.
From Develop to Main
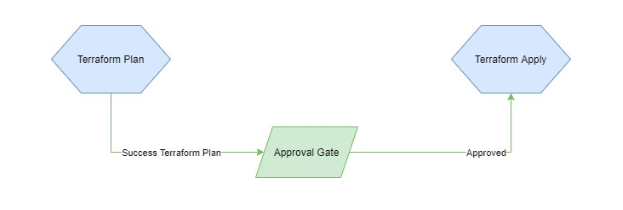
Going from the Develop branch to the main with a pull request will trigger the Production Pipeline YAML to run. I’ve added the approval stage. Detail on how to add the gate here Azure DevOps Pipelines Approval Gates
Creating and approving a pull request from the develop branch to the main will trigger the production pipeline, building the resources required for the production. The code of the pipeline can be found here Production-Pipeline
Inspec
- A testing stage has been added that uses Inspec to validate the terraform code.
- Inspec-Azure is a resource pack provided by Chef that allows users to write tests for resources to deploy to Azure. It is for testing and auditing infrastructure. - test can be used to validate azure resources deployed via code using Terraform.
Once the production environment runs successfully, it should be below.
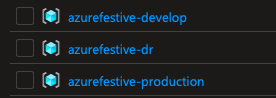
Trigger Production to DR
The Production & DR environments are both deployed in the same main branch. The DR will only run once the Production pipeline has run successfully. You can modify the code here.
pipelines:
- pipeline: TerraformOps-DR source: TerraformOps-Production
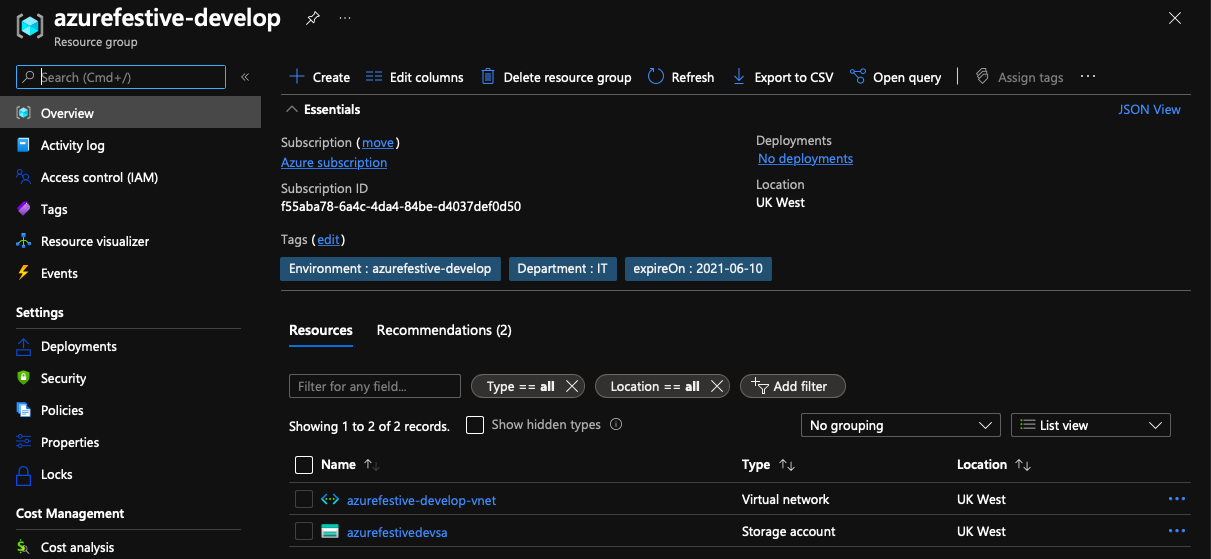
Resources Deployed
I hope at the end of this tutorial, you will learn some CI/CD deployment, terraform, pipelines and testing.
Thank you for reading
Further Reading :