

Building Infrastructure with Azure Pipelines using Terraform
Date published:
Terraform is a tool for building, changing and versioning infrastructure as code. Terraform can manage existing cloud service providers as well as onsite infrastructure. In this tutorial, you will learn how to automate your infrastructure using Terraform by deploying a Resource group, an App service plan and an App service required to deploy a website. This post will be using a sample Azure DevOps web application called PartsUnlimited.
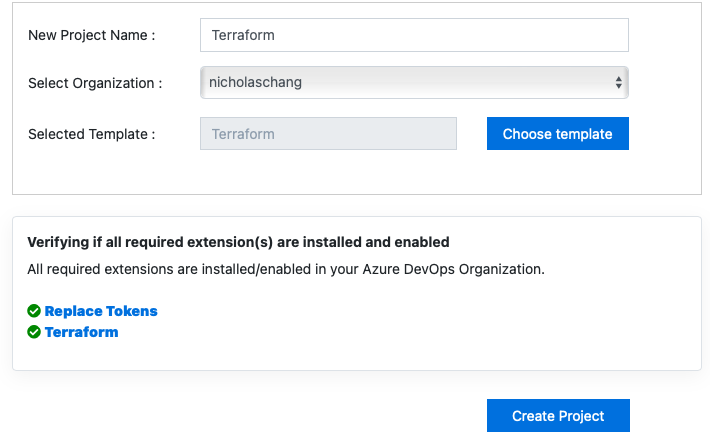
Go to this link and Azure DevOps Demo Generator and select a project name to host all the code and run the pipeline on and ensure you have the extension enabled too. If you do not have the extension installed, please go to the marketplace and install it in your Azure DevOps organisation, then click on create the project.
Navigate back to the Azure DevOps project, select the project created, go to the repo, and select terraform as the branch. You will see a folder called terraform, and within the folder, you will file “webapp.tf”
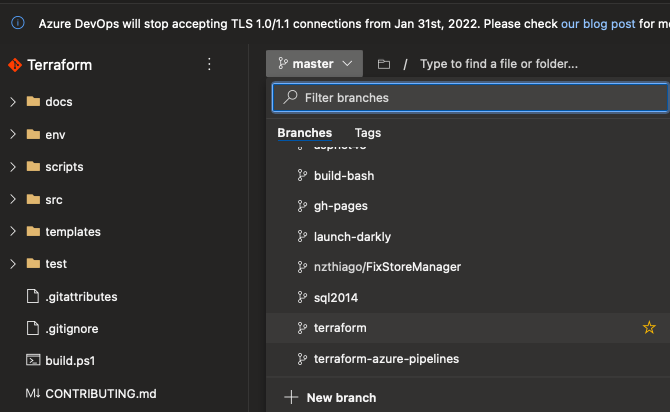

webapp.tf is the main terraform configuration file. Terraform uses its file format called HCL, which is very similar to YAML for azure pipelines.
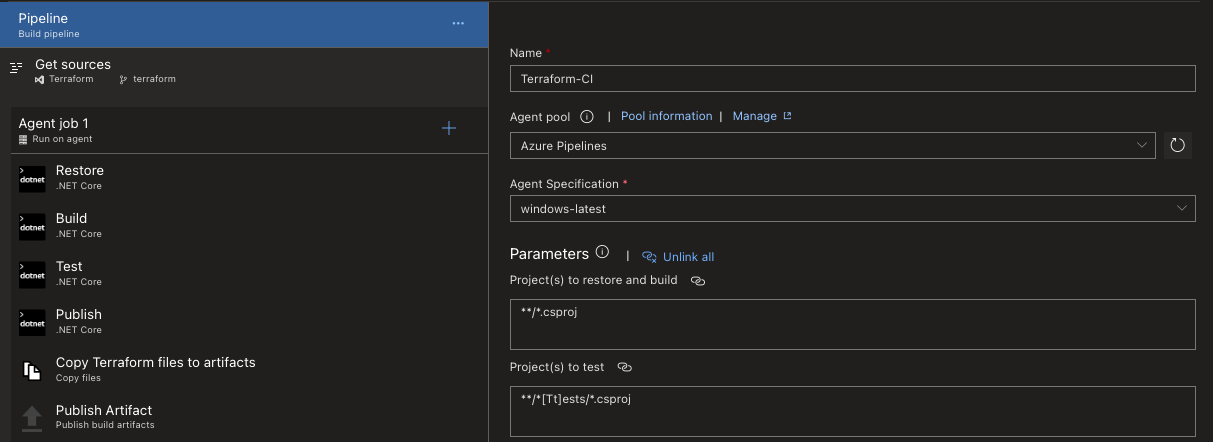
Next, we will want to run the pipeline to build the resources. Go to the pipeline section and edit the relevant field created for you, and you should see something like the below. You might need to select an agent specification for your agent pool to run. I have chosen windows-latest as the operating system.
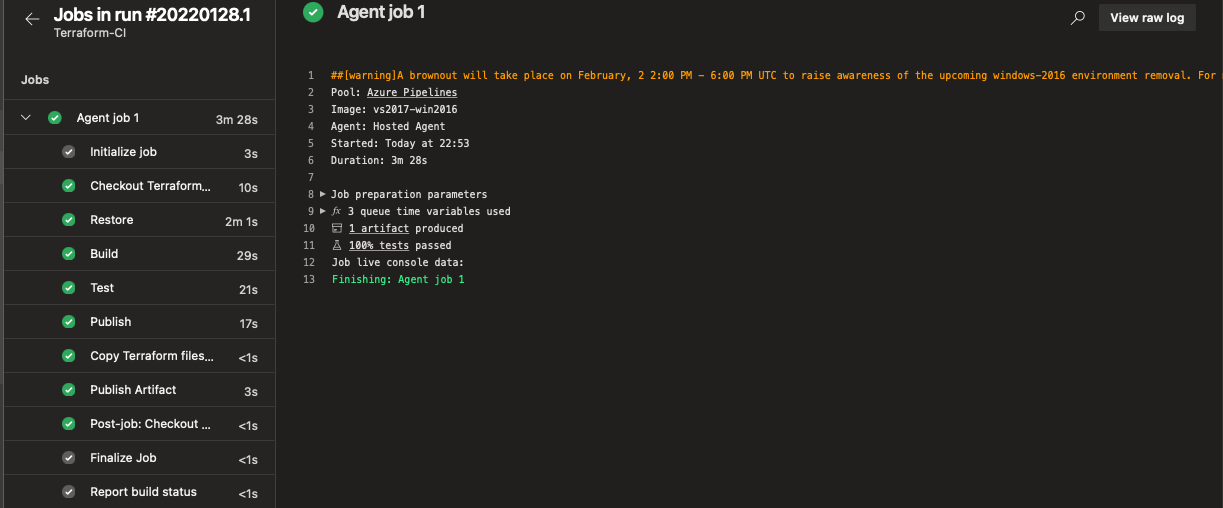
These steps will use jobs such as restore, build, test, and publish output into a zip file package for the web application deployment.
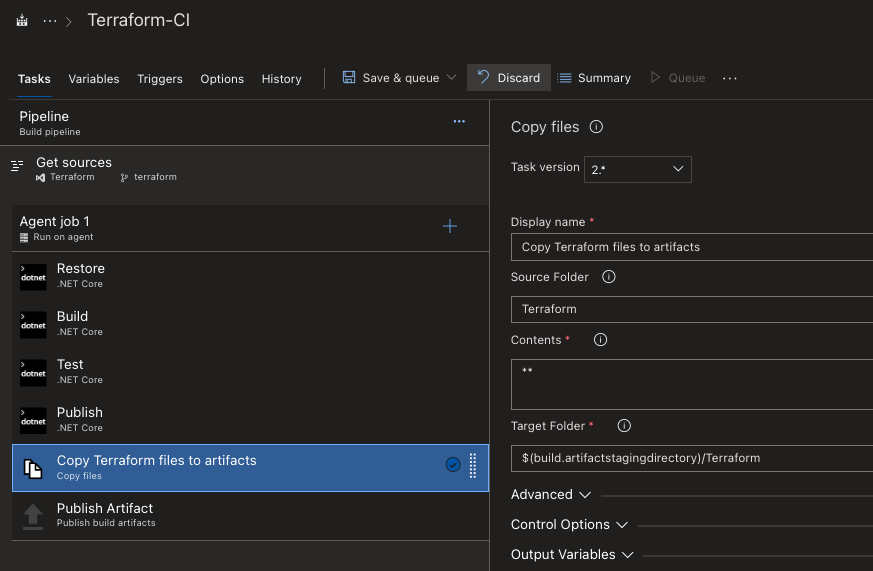
We will need to publish the terraform files to build the artefact, which is in your pipeline. In your copy files task, it will copy the Terraform file to an Artifact directory. You can click on Save & Queue, give it a name and click on save and run to start the build and create the artefact. The build process will take several minutes to complete.
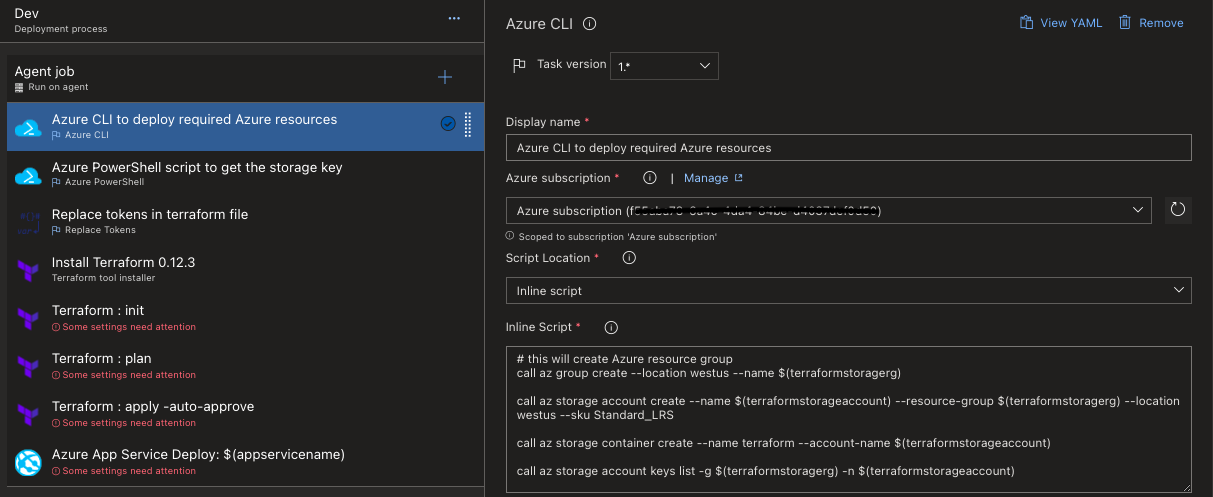
In this stage, we will create azure resources using terraform as part of the pipeline and deploy the PartsUnlimited application to the Azure app service. To do this, navigate to your pipeline section and click on release and edit the release. Select the job and task under the Dev stages.

You might need to authorise the Azure CLI task. Select the Azure subscription from the drop-down list and click the authorise icon to set up the service connection automatically.
Terraform stores state locally in a file named terraform. tfstate. Terraform writes the state data to a remote data store when dealing with a remote state. The Azure CLI task will create an Azure storage account and storage container to store Terraform state.
Go to the Azure PowerShell task and ensure the azure connection type is selected as Azure Resource Manager and select your Azure service connection from the list under your subscription. We will need to configure the terraform backend, and to this, we will need the storage account access key, which it will obtain from the PowerShell script.
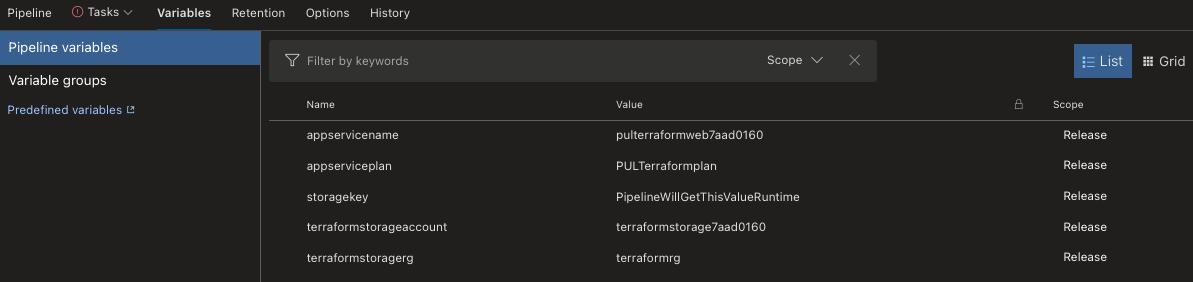
Select the Replace token task to replace those values obtained with the variables defined. In this case, it has populated the name and value for you. These will be the value used for the azure deployment of the resource.
In this stage, we will configure the terraform task. The main terraform workflow usually is.
- init
- plan
- apply
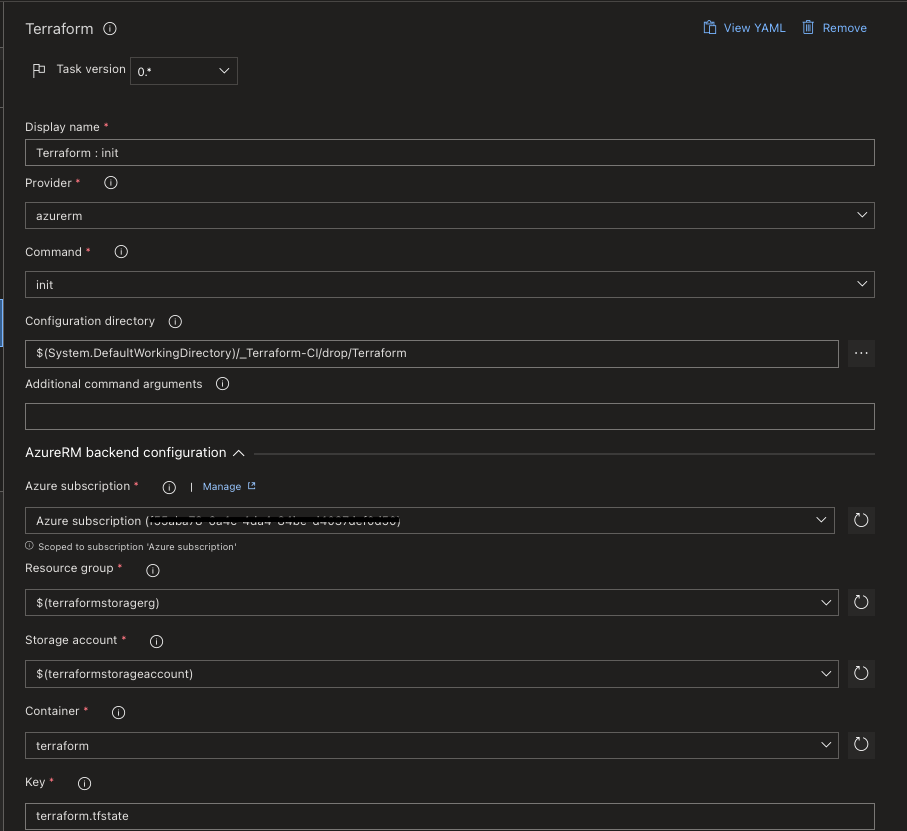
First, you need to go to the Terraform init and set the subscription and enter a name you want to call the container for the blob storage to store the state file. This task runs terraform init command. The terraform init command will initialize the working directory and download any required providers.
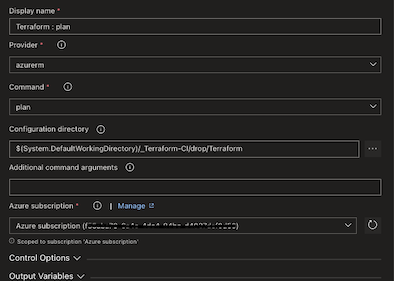
In the Terraform plan job, ensure you have the correct command in the field and select your subscription.
The terraform plan command will produce a plan showing any changes from the desired state and the current configuration. This plan often can tell you whether there is an error.
The Terraform apply will run the file to deploy the resources. You will also get prompted for confirmation of the changes. We will auto-approve the command in this stage, so we do not need validation.

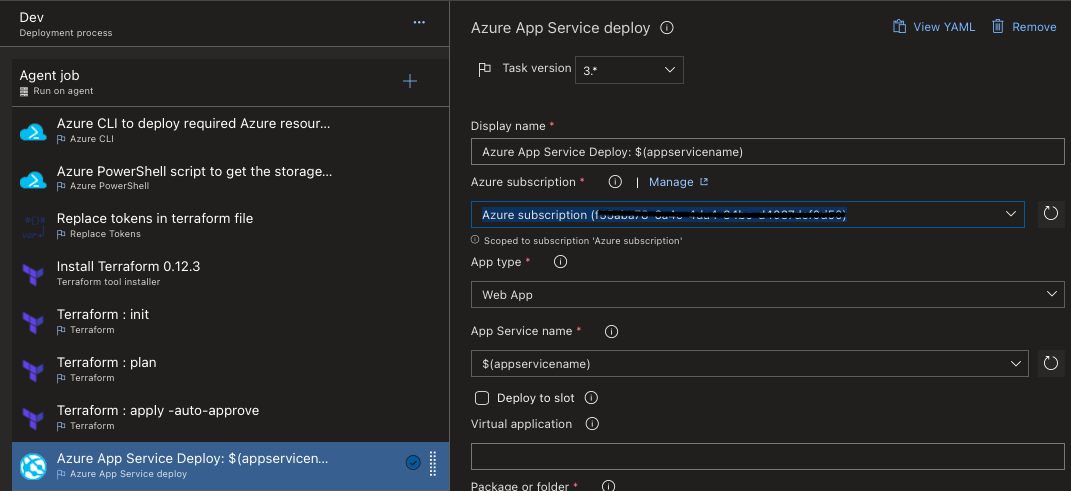
The final stage is to configure the app service, and you will need to set the subscription and ensure it has value in the app service field. Once set, click on save and create release and
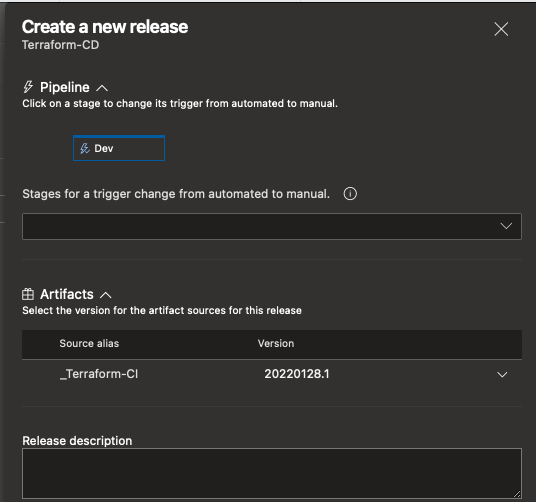
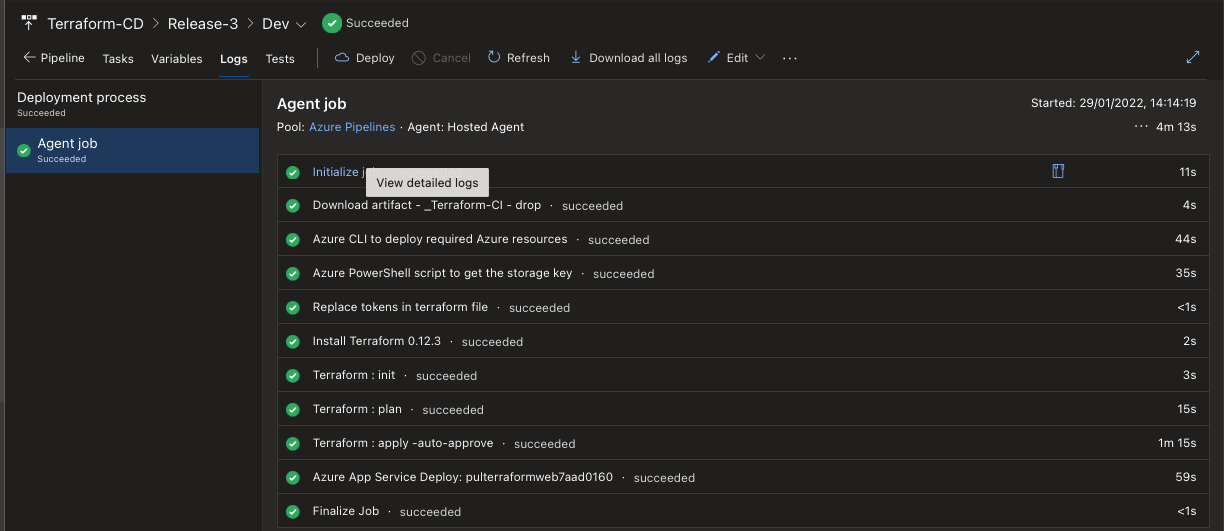
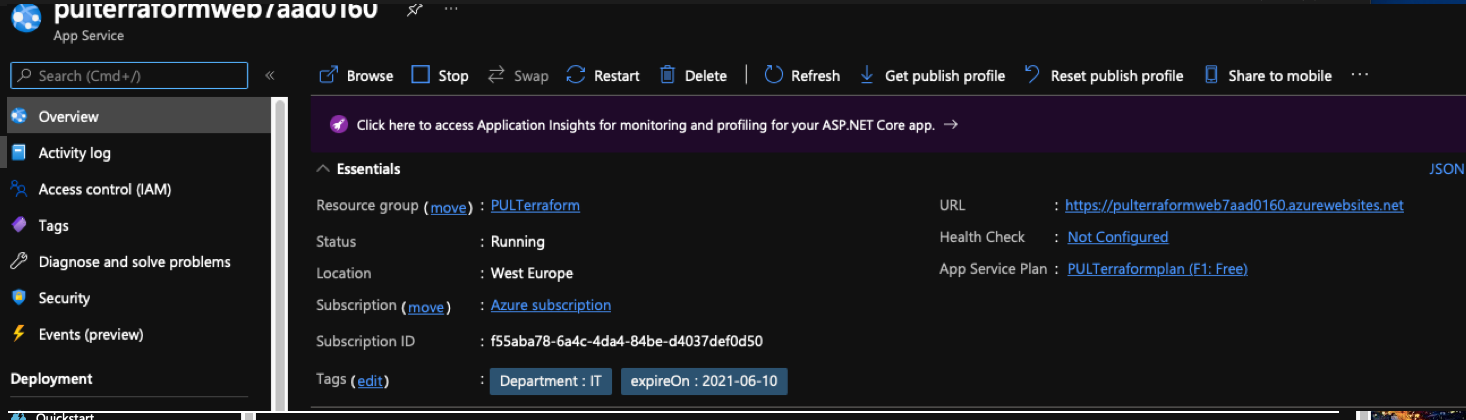
Once you have run the release, it will begin to deploy the resources to azure to create the web app service.
Further Reading